There’s something irresistible about the aroma of freshly baked bread wafting through a kitchen. This reka bread recipe brings that warmth home with every golden, crusty loaf. Simple ingredients, slow patience, and a rustic charm make this a loaf you’ll return to time and again.
Overview of the Reka Bread Recipe
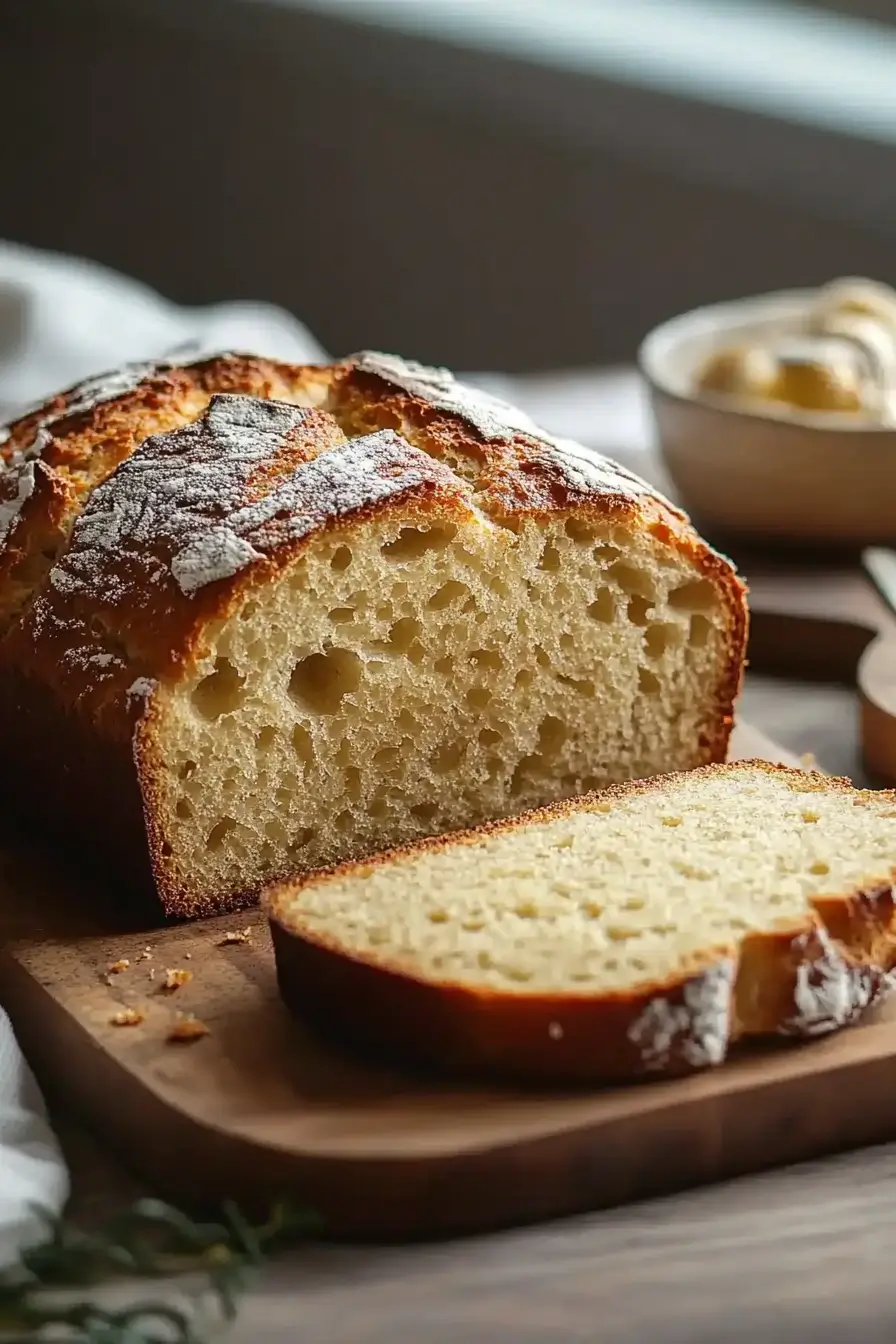
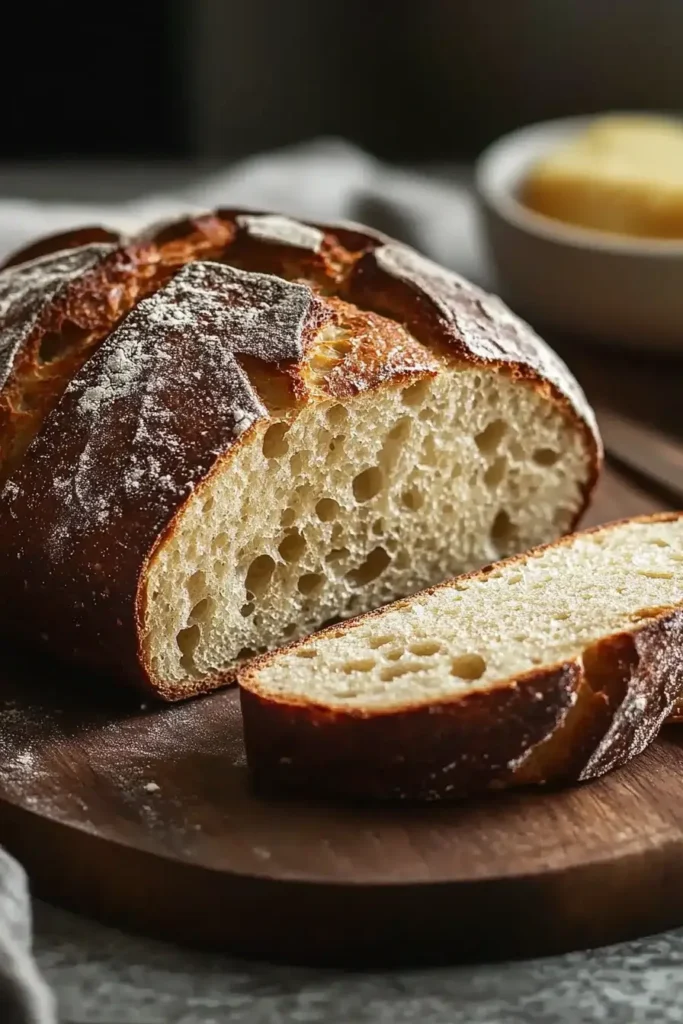
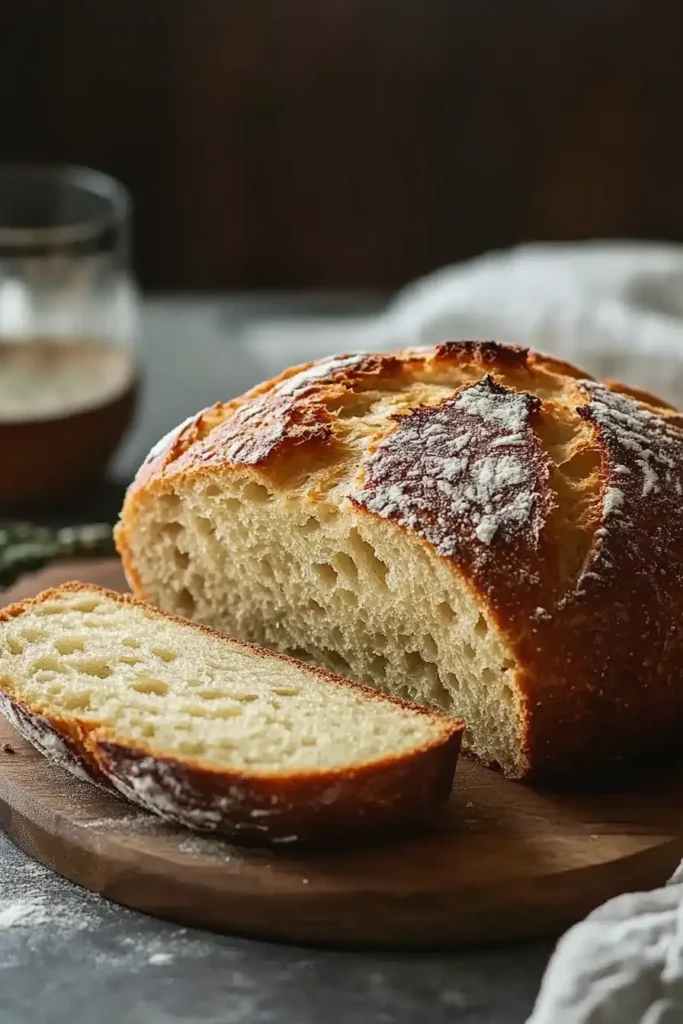
The reka bread recipe is a love letter to simplicity. It’s a golden-crusted, soft-crumbed artisan loaf that needs only flour, yeast, water, and salt to shine. No gadgets, no gimmicks — just honest ingredients and a bit of time. You’ll mix the dough, let it rise, shape it with your hands, and watch it transform in the oven from a pale lump into a deeply colored, chewy-centered beauty.
The crust is where the magic happens — blistered and rustic, with just enough crackle to satisfy every bite. The inside? Airy, soft, and moist, with a tenderness that holds up to a pat of butter or a swipe of jam. The reka bread recipe makes the kind of loaf you could imagine cooling on a grandmother’s counter, surrounded by sunlit windows and the echo of laughter.
It’s a year-round staple. In winter, it pairs with thick stews. In summer, it becomes the foundation for bruschetta or picnic sandwiches. Serve it warm from the oven or toasted the next morning with coffee — it’s versatile, forgiving, and infinitely lovable.
Ingredients List for Reka Bread Recipe
This reka bread recipe requires just a handful of ingredients — pantry staples that transform into something greater than the sum of their parts:
- 3 ¼ cups (390g) bread flour (or all-purpose flour)
- 1 ¼ teaspoons (8g) fine sea salt
- 1 teaspoon (4g) sugar
- 1 ½ teaspoons (5g) active dry yeast
- 1 ¼ cups (300ml) warm water (100–110°F)
- 1 tablespoon olive oil (optional, for flavor and softness)
Optional Add-Ins (choose one or combine a few):
- 1 tablespoon fresh rosemary, chopped
- 2 teaspoons garlic powder
- 1 tablespoon sesame or poppy seeds
A note on quality: since this reka bread recipe uses few ingredients, each one matters. Use filtered water if possible, fresh yeast, and a high-protein flour to ensure a great rise and structure.
Necessary Tools for Preparation
To make this reka bread recipe with ease, here are the essential tools you’ll want nearby:
- Large Mixing Bowl: This is where the dough starts its journey — mixing, hydrating, and rising.
- Wooden Spoon or Dough Whisk: To stir the sticky dough during initial mixing.
- Bench Scraper: Ideal for folding and shaping the dough on your work surface without sticking.
- Clean Kitchen Towel or Plastic Wrap: For covering the dough during its rise, keeping moisture in.
- Dutch Oven or Baking Stone: A Dutch oven mimics a professional steam oven, giving the loaf that prized crust. A baking stone is a great alternative.
- Parchment Paper: Prevents sticking during transfer and makes cleanup easier.
- Kitchen Scale (Optional but Recommended): Accuracy counts, especially for flour and water ratios.
- Oven Mitts & Cooling Rack: For safe handling and letting the bread rest properly after baking.
These tools help make the process smoother but don’t let the list intimidate you — this reka bread recipe is beginner-friendly and forgiving. With a little practice, it becomes second nature.
Ingredient Additions & Substitutions
One of the best things about this reka bread recipe is how adaptable it is. Whether you’re working around allergies, pantry shortages, or simply trying new flavor combinations, here are a few thoughtful substitutions and additions:
- Flour: While bread flour yields a chewier structure, you can easily use all-purpose flour with great results. Want a bit more depth? Replace ½ cup with whole wheat flour, and add 1 extra tablespoon of water to maintain hydration.
- Yeast: Active dry yeast is the default, but instant yeast can be used — just reduce the amount to 1 teaspoon and skip the blooming step.
- Sugar: This small amount is to feed the yeast and promote browning. You can substitute it with honey or maple syrup in equal measure for a subtle shift in flavor.
- Oil: While optional, olive oil adds a softer crumb and a faint richness. Avocado oil or sunflower oil work just as well.
- Flavor Boosters: The base reka bread recipe is pure and simple, but a pinch of dried herbs (oregano, thyme), a handful of chopped olives, or a teaspoon of caraway seeds folded in can transform the loaf into something signature.
Gluten-free baking requires a separate formula and isn’t a 1:1 substitute here — but for those avoiding dairy or eggs, you’re in the clear: this reka bread recipe is naturally free of both.
Step-by-Step Instructions for the Perfect Reka Bread Recipe
The beauty of this reka bread recipe lies in the process. It’s hands-on, tactile, and filled with small sensory joys. Let’s walk through each step with care.
❶ Bloom the Yeast (if using active dry yeast)
In a small bowl, combine the warm water (100–110°F) and sugar. Sprinkle the active dry yeast over the surface and stir gently. Let it sit for 5–7 minutes until foamy and bubbly. If you’re using instant yeast, skip this step and add it directly to the flour in the next step.
❷ Mix the Dough
In a large bowl, whisk together flour and salt. If using any dry herbs, seeds, or garlic powder, mix them in now. Pour in the yeast mixture and olive oil (if using). Stir with a wooden spoon or dough whisk until a shaggy, sticky dough forms. It will look rough and lumpy — that’s exactly right.
❸ First Rise (Bulk Fermentation)
Cover the bowl with a damp kitchen towel or plastic wrap. Let it rise at room temperature (70–75°F) for 1 ½ to 2 hours, until doubled in size. The dough should jiggle slightly and feel pillowy when pressed. This is the part where the magic starts.
❹ Shape the Dough
Lightly flour a clean work surface. Turn the dough out and use a bench scraper to fold it onto itself 3–4 times — this gives it structure. Shape it into a round or oval loaf, seam-side down. The dough will feel soft but elastic under your hands.
❺ Second Rise (Proofing)
Place the shaped dough onto a piece of parchment paper or into a well-floured proofing basket. Cover loosely and let it rise for another 45–60 minutes. It should puff slightly, but not spread too much. Preheat your oven to 450°F during this time, with a Dutch oven or baking stone inside to heat up.
❻ Score and Bake
If using a Dutch oven, carefully remove it from the oven, lift the dough using the parchment, and place it inside. Score the top with a sharp knife or bread lame — a simple “X” or a few diagonal lines. This controls how the bread expands. Cover and bake for 30 minutes, then uncover and bake another 15–20 minutes until the crust is deep golden brown.
❼ Cool Completely
This is the hardest part — waiting. Let the loaf rest on a cooling rack for at least 1 hour before slicing. The crumb finishes setting during this time, and cutting too early can turn your beautiful bread gummy.
Serving Suggestions for the Reka Bread Recipe
One of the things that makes the reka bread recipe so beloved is how versatile it is. This crusty, golden loaf adapts to whatever your table needs — morning toast, hearty lunch sandwiches, or a rustic side to a cozy dinner.
Try slicing the reka bread recipe thick and serving it warm with a generous slather of salted butter and a drizzle of honey. That combo alone could convert even the staunchest store-bought bread fan. Toasted slices also hold up well to toppings like avocado, tomato confit, or soft scrambled eggs. The contrast of the soft interior and crisp crust makes every bite memorable.
For lunch, this bread transforms into the ultimate sandwich base. Use it to elevate grilled cheese, turkey and arugula paninis, or even a simple peanut butter and banana stack. Its sturdy texture handles moist fillings without getting soggy — one of the lesser-known but best perks of this reka bread recipe.
And when dinner rolls around? A few slices alongside a bowl of chili, lentil soup, or roasted vegetable stew add both comfort and a touch of rustic elegance. Brush with olive oil, rub with garlic, and crisp in the oven for homemade crostini.
You can even cube up day-old slices of the reka bread recipe for croutons, or blitz into breadcrumbs for coating chicken or sprinkling over mac and cheese. It’s more than just bread — it’s a kitchen companion.
Tips for the Best Reka Bread Recipe Results
The beauty of the reka bread recipe lies in its forgiving nature, but there are a few pro tips that will take your loaf from good to outstanding:
- Use a Kitchen Scale: Measuring by weight ensures consistent hydration and perfect texture. Bread is science, and precision matters.
- Watch the Dough, Not the Clock: Rising times vary depending on your room temperature and yeast strength. If your dough hasn’t doubled yet, give it more time — patience is key.
- Use Steam or a Dutch Oven: The reason this reka bread recipe gets such a crisp crust is due to steam during baking. If you don’t have a Dutch oven, place a metal tray on the oven’s lower rack while preheating, and pour in a cup of hot water just after you put the loaf in.
- Let It Cool: Slicing too soon releases steam and gums up the crumb. Let your reka bread rest for at least an hour. It’s worth it.
- Don’t Overflour: If your dough feels sticky during shaping, resist the urge to overload it with flour. A light dusting is enough. Too much flour can dry the loaf out and make the crumb dense.
- Get Creative with Mix-Ins: This reka bread recipe is a blank canvas. Add chopped olives, toasted nuts, dried cranberries, or caramelized onions for flavor surprises in every bite.
These little adjustments — especially with temperature, timing, and handling — are what make the difference between a good loaf and a loaf you brag about.
Storage Instructions for Reka Bread Recipe
Now that you’ve made the perfect loaf using this reka bread recipe, here’s how to store it so you can enjoy every slice at its best:
- Room Temperature: Keep your bread on the counter, loosely wrapped in parchment or a paper bag, for up to 3 days. Avoid sealing it in plastic, which traps moisture and softens the crust.
- Freezing: The reka bread recipe freezes beautifully. Slice the loaf completely, place slices between parchment, and store in a freezer-safe bag. This makes it easy to grab a slice or two as needed. It will keep for up to 2 months.
- Reheating: To revive a slice, toast it straight from frozen or warm it in a 300°F oven for 5–10 minutes. To re-crisp a half loaf, spritz it with water and bake it uncovered for 10 minutes at 350°F.
Avoid refrigerating your loaf — cold temps actually speed up staling. If you won’t finish the loaf in a few days, freezing is the best route.
Whether you enjoy it fresh, toasted, or days later, this reka bread recipe is designed to hold up in both flavor and structure.
FAQ About the Reka Bread Recipe
What does “reka” mean in reka bread recipe?
The word “reka” isn’t tied to a specific regional cuisine, but in this context, it refers to a rustic, simplified bread style — minimal ingredients, honest technique, and a loaf that feels homey. It captures the essence of this reka bread recipe: accessible, unfussy, and full of character.
Can I make the reka bread recipe without a Dutch oven?
Absolutely. While a Dutch oven helps trap steam and create that signature crust, you can bake the loaf on a baking stone or sheet. Add a tray of hot water to the oven’s bottom rack during baking to mimic the steam environment.
Is this reka bread recipe good for beginners?
Yes. It’s one of the most beginner-friendly artisan bread styles. No kneading, no complicated shaping, and very forgiving fermentation windows. It’s the perfect confidence-builder for home bakers.
Can I use sourdough starter instead of yeast?
You can adapt the reka bread recipe for sourdough by substituting ½ cup of active starter and adjusting flour and water accordingly. The flavor will be tangier and the rise slower — but just as satisfying.
Can I double the recipe?
Yes, simply double all ingredients and divide the dough into two loaves after the first rise. Bake separately for best results.
Conclusion
There’s a kind of grounding comfort in baking bread — the mixing, the waiting, the transformation. This reka bread recipe delivers more than just a loaf; it delivers an experience. One rooted in patience, simplicity, and the joy of homemade food.
Whether you’re a seasoned baker or just beginning your bread journey, this recipe invites you to slow down and savor the process. From that first puff of yeast to the crackle of crust when you slice in, the reka bread recipe offers a moment of connection — to ingredients, to time, and to the people you’ll share it with.
So take a deep breath, flour your hands, and give this loaf life. You won’t regret it — and your kitchen will smell amazing.
Print
Rustic Reka Bread Recipe
- Total Time: 2 hours 45 minutes (includes rising)
- Yield: 1 loaf (8 slices) 1x
- Diet: Vegetarian
Description
This artisan reka bread recipe delivers a crusty, golden loaf with a soft crumb—perfect for beginners and home bakers alike.
Ingredients
Main Dough:
- 3 ¼ cups (390g) bread flour or all-purpose flour
- 1 ¼ tsp (8g) fine sea salt
- 1 tsp (4g) sugar
- 1 ½ tsp (5g) active dry yeast
- 1 ¼ cups (300ml) warm water (100–110°F)
- 1 tbsp olive oil (optional)
Optional Add-Ins:
- 1 tbsp fresh rosemary, chopped
- 2 tsp garlic powder
- 1 tbsp sesame or poppy seeds
Instructions
- Bloom Yeast (if using active dry): Mix warm water and sugar in a bowl, sprinkle yeast on top, stir, and let sit 5–7 min until foamy.
- Mix Dough: Combine flour, salt, and any dry add-ins in a large bowl. Add yeast mixture and olive oil. Stir until a sticky dough forms.
- First Rise: Cover and let rise at room temp for 1½–2 hours until doubled and pillowy.
- Shape Dough: Turn dough onto floured surface, fold 3–4 times, and shape into a round or oval loaf.
- Second Rise: Place on parchment or in floured basket, cover, and let rise 45–60 min. Preheat oven to 450°F with Dutch oven inside.
- Score & Bake: Score top, transfer to Dutch oven, cover and bake 30 min. Uncover and bake 15–20 more min until golden brown.
- Cool: Let cool on rack for 1 hour before slicing.
Notes
- Use filtered water and fresh yeast for best results.
- Substitute all-purpose flour, honey, or herbs to vary flavor.
- Store at room temp up to 3 days or freeze sliced for 2 months.
- To crisp crust after storage, reheat in oven at 350°F for 10 min.
- Prep Time: 15 minutes
- Cook Time: 45 minutes
- Category: Bread
- Method: Baking
- Cuisine: Artisan / Rustic European-inspired
Nutrition
- Serving Size: 1 slice
- Calories: 165 kcal
- Sugar: 1g
- Sodium: 210 mg
- Fat: 2 g
- Saturated Fat: 0 g
- Unsaturated Fat: 2g
- Trans Fat: 0 g
- Carbohydrates: 32 g
- Fiber: 1.5 g
- Protein: 5 g
- Cholesterol: 0 mg
Additional Recommended Recipes
If you loved this reka bread recipe, you’ll definitely enjoy:
- Cinnamon Raisin Bagel Recipe – A warm, chewy classic with sweet swirls of cinnamon—perfect with morning coffee.
- Sweet Alabama Pecan Bread Recipe – Buttery, nutty, and rich with Southern charm in every bite.
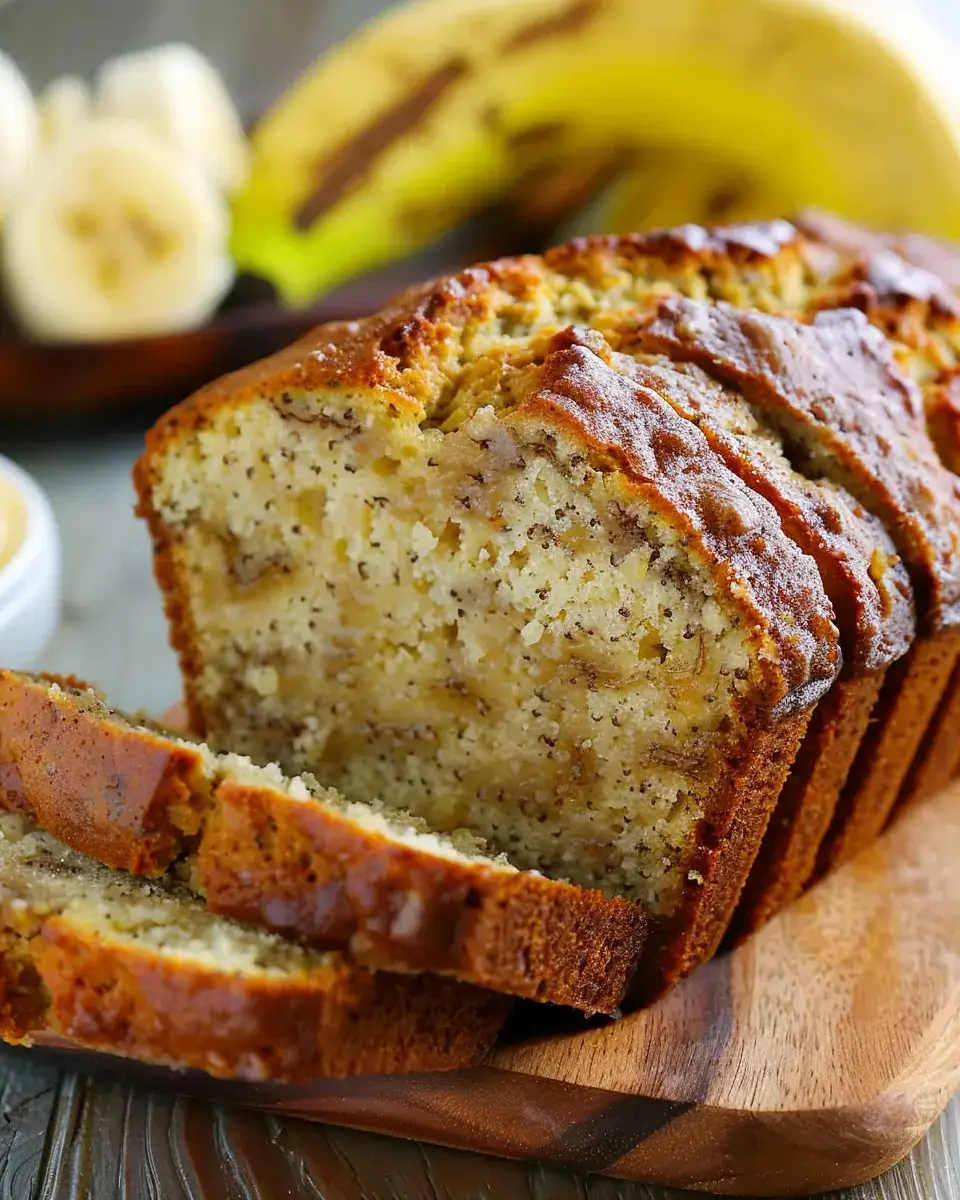
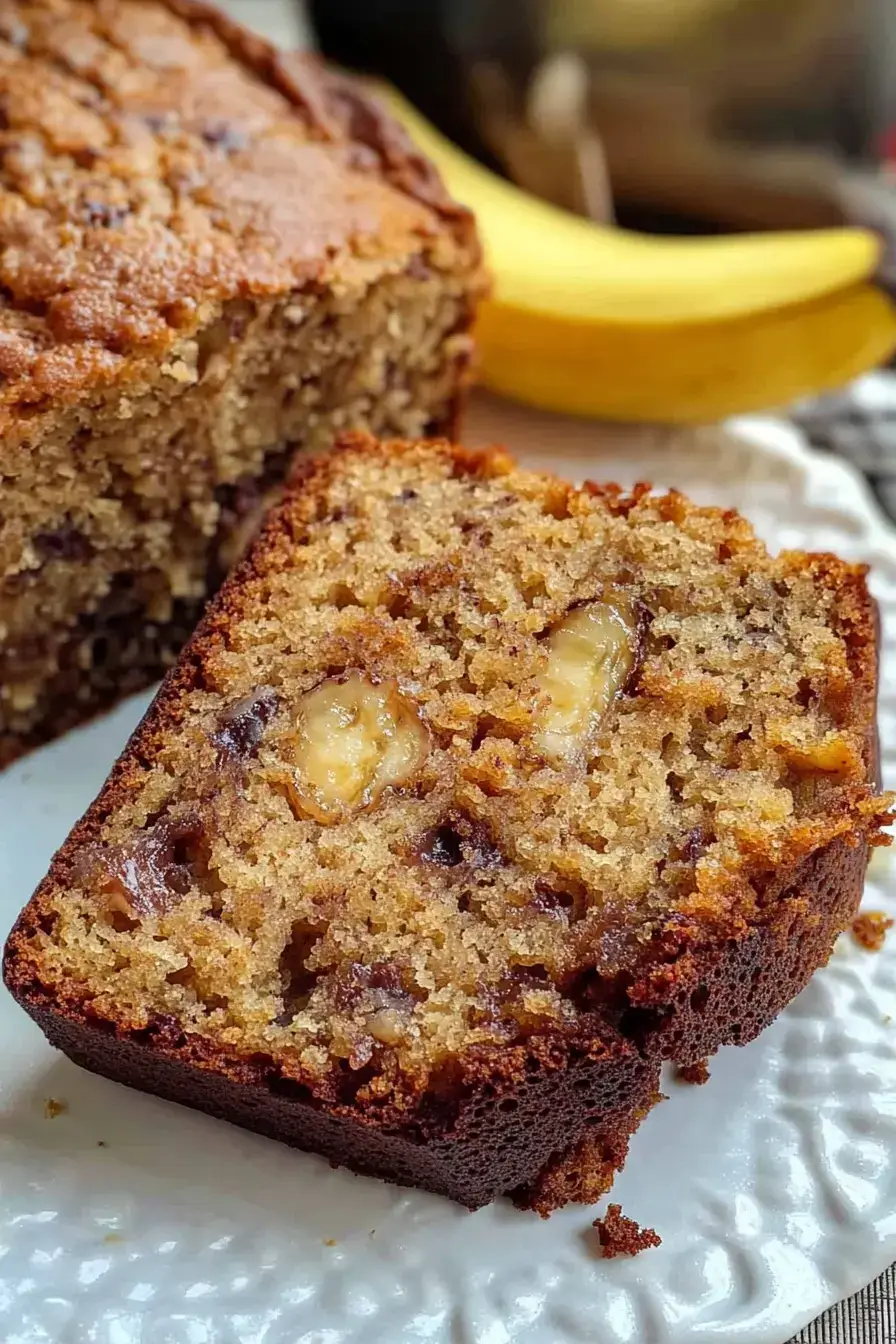
- Snickerdoodle Banana Bread Recipe – Soft and cozy with a cinnamon-sugar twist that feels like a warm hug.
- Cinnamon Donut Bread Recipe – The best of donuts and quick bread combined—moist, sugary, and impossible to resist.
These bakes bring that same warmth and rustic spirit to your table—happy baking!