There’s something truly magical about biting into a dessert that feels like a hug from the past. This cherries in the snow recipe brings back every cozy memory of family gatherings, church potlucks, and snowy holidays spent around the table. With its airy layers of angel food cake, luscious cream cheese filling, and ruby-red cherries, it’s a sweet masterpiece that feels like winter on a plate — yet deliciously timeless all year long.
Overview of the Cherries in the Snow Recipe
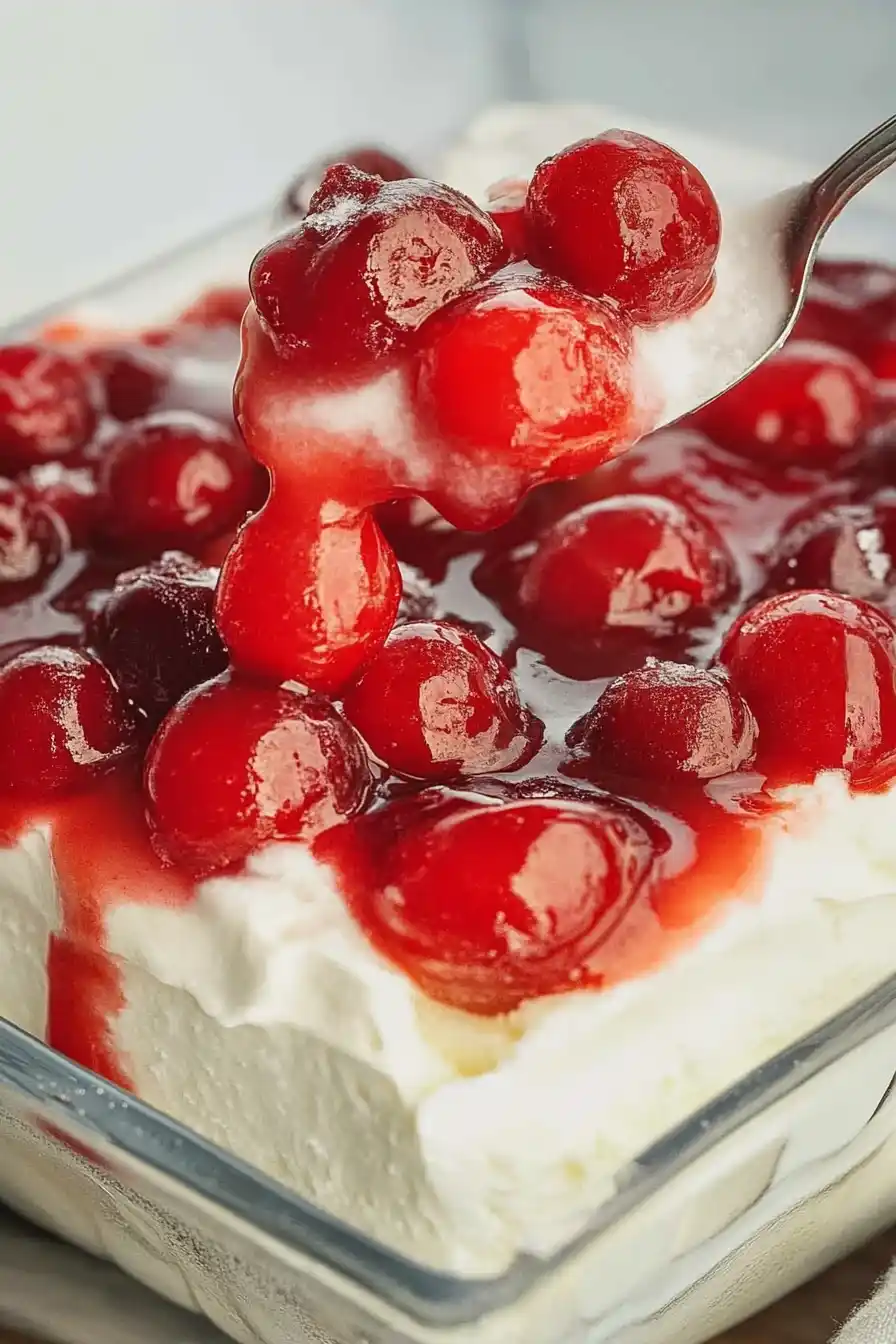
This cherries in the snow recipe isn’t just a dessert — it’s an experience. One bite and you’ll understand why it has endured through generations. Imagine a soft, fluffy base of angel food cake, topped with a creamy, lightly sweetened mixture of cream cheese and whipped topping. Then, a crowning layer of glossy cherry pie filling spills over the top, its tartness balancing every decadent bite.
The textures dance together: cloud-like cake, silky cream, bright fruit. The flavors are nostalgic yet fresh — a reminder of childhood innocence, special family moments, and the excitement of a snowy day.
What makes this cherries in the snow recipe special?
- No-Bake Simplicity: Minimal fuss, maximum flavor.
- Crowd-Pleasing: Feeds 12–16 people easily.
- Make-Ahead Magic: Better when chilled overnight!
- Customizable: Easy to adapt for different diets or tastes.
A Brief History of Cherries in the Snow
The exact origin of the cherries in the snow recipe is a little misty, like snow swirling in winter wind. However, it gained its fame in mid-20th century America, when convenience foods like angel food cake mix and canned cherry pie filling became kitchen staples. Housewives and home bakers embraced no-bake desserts that were beautiful, quick, and celebratory. Over time, this cheerful, red-and-white beauty became a beloved holiday and potluck tradition — especially in the Midwest and Southern United States.
Ingredients List
To make this unforgettable cherries in the snow recipe, you’ll need just a handful of classic, pantry-friendly ingredients. Quality matters here — fresh, real cream cheese and a fluffy angel food cake make all the difference!
Here’s what you’ll need:
- 1 prepared angel food cake (store-bought or homemade)
- 1 package (8 oz) cream cheese, softened to room temperature
- 1 cup powdered sugar (also called confectioners’ sugar)
- 1 tub (8 oz) whipped topping (such as Cool Whip), thawed
- 1 can (21 oz) cherry pie filling
- 1 teaspoon pure vanilla extract
Pro Tip: If you’re feeling adventurous, you can swap the canned cherry pie filling for a homemade version using fresh or frozen cherries!
Notes About Ingredients:
- Angel Food Cake: Look for one that’s soft and springy, not dry. Homemade always wins if you have time!
- Cream Cheese: Full-fat cream cheese yields the creamiest filling, but you can use reduced-fat if you prefer.
- Whipped Topping: Make sure it’s fully thawed for easy folding into the mixture.
- Cherry Pie Filling: Classic sweet-tart cherry flavor works best, but feel free to experiment with blueberry or raspberry pie fillings too.
Every element of this cherries in the snow recipe is designed to highlight that beautiful balance between lightness and indulgence. Don’t skimp on the quality — it shows in every bite!
Necessary Tools for Preparation
One of the best things about this cherries in the snow recipe is that you don’t need any fancy equipment. Just a few simple kitchen basics, and you’re on your way to snowy, cherry-topped bliss.
Here’s what you’ll need:
- 9×13-inch baking dish: Glass or ceramic works beautifully to show off the layers.
- Large mixing bowl: For beating the cream cheese and sugar together.
- Hand mixer or stand mixer: Essential for a smooth, fluffy filling.
- Rubber spatula: Perfect for folding whipped topping gently into the cream cheese mixture.
- Sharp serrated knife: To cube the angel food cake without squishing it.
- Offset spatula or butter knife: To spread layers evenly.
- Serving spoon: For dishing out beautiful scoops.
Optional but helpful:
- Piping bag: If you want to get fancy and pipe dollops of whipped topping on top before serving.
- Clear trifle bowl: For an elevated, showstopping presentation.
Tip: Using a glass dish lets the vibrant cherry layer shine through — part of the “snowy” magic of this dessert!
Ingredient Additions & Substitutions for the Cherries in the Snow Recipe
One of the best things about this cherries in the snow recipe is how wonderfully adaptable it is. Whether you’re looking for a lighter version, need a gluten-free option, or just want to personalize the flavors, there’s a substitution for you.
Angel Food Cake Swaps
- Gluten-Free Angel Food Cake:
Easily replace the regular angel food cake with a gluten-free variety — either homemade or store-bought. Many grocery stores now carry them in the bakery section! - Homemade Angel Food Cake:
Want to go the extra mile? A homemade angel food cake, made with whipped egg whites and just a touch of sugar, creates an even more tender, melt-in-your-mouth base for this cherries in the snow recipe.
Cherry Topping Variations
- Homemade Cherry Pie Filling:
Simmer fresh or frozen cherries with sugar, cornstarch, and lemon juice for a simple, homemade cherry topping. This adds a rich, natural flavor. - Other Fruits:
If you’re craving a twist, try blueberry, raspberry, or strawberry pie filling instead of cherry. These all complement the snowy cream layer beautifully.
Cream Cheese Alternatives
- Lower-Fat Cream Cheese:
Swap full-fat cream cheese for Neufchâtel cheese for a slightly lighter dessert without sacrificing creaminess. - Mascarpone Cheese:
For an ultra-luxurious take on this cherries in the snow recipe, substitute mascarpone for an even richer, more decadent flavor.
Whipped Topping Substitutions
- Freshly Whipped Cream:
Prefer an all-natural route? Use freshly whipped heavy cream (beat until stiff peaks form) sweetened lightly with powdered sugar.
Quick Tip: If using fresh whipped cream, serve the dessert within a day to maintain the best texture.
Step-by-Step Instructions for Making Cherries in the Snow Recipe
Ready to create a dreamy dessert that feels like a snowstorm of sweetness? Follow these easy steps for the perfect cherries in the snow recipe.
❶ Prepare the Cream Cheese Layer
In a large mixing bowl, beat the softened cream cheese until smooth and fluffy, about 2 minutes. Add the powdered sugar and vanilla extract, continuing to beat until the mixture is completely smooth and free of lumps.
Once blended, gently fold in the thawed whipped topping with a rubber spatula. Fold carefully to keep the mixture light and airy — you want a cloud-like texture that spreads easily.
Visual Cue: Your cream layer should look glossy, creamy, and hold soft peaks.
❷ Cube the Angel Food Cake
Using a sharp serrated knife, slice the angel food cake into 1-inch cubes. Work gently to avoid smashing the delicate structure of the cake.
Tip: Let the knife do the work — a sawing motion helps keep the cubes neat and intact.
❸ Layer the Dessert
In a 9×13-inch glass or ceramic baking dish, arrange half of the angel food cake cubes in an even layer across the bottom.
Spread half of the cream cheese mixture gently over the cake, smoothing it into an even blanket of creamy goodness.
Next, add a generous half of the cherry pie filling over the cream layer, spreading it out into shiny ruby swirls.
Repeat the layers:
- Remaining cake cubes
- Remaining cream mixture
- Top with the remaining cherry pie filling, letting some cherries peek through for that classic snowy look.
Bonus: If you prefer a trifle presentation, you can layer the components in a clear trifle bowl for a stunning vertical effect!
❹ Chill Before Serving
Cover the dish tightly with plastic wrap or a fitted lid. Refrigerate for at least 4 hours, or overnight if possible. This resting time allows the flavors to meld beautifully and ensures the dessert slices neatly.
Serving Tip: For cleaner slices, dip your knife into hot water, wipe it dry, and then cut.
Extra Step: Optional Garnishes
While the classic cherries in the snow recipe is a beauty all by itself, you can jazz it up even more if you like:
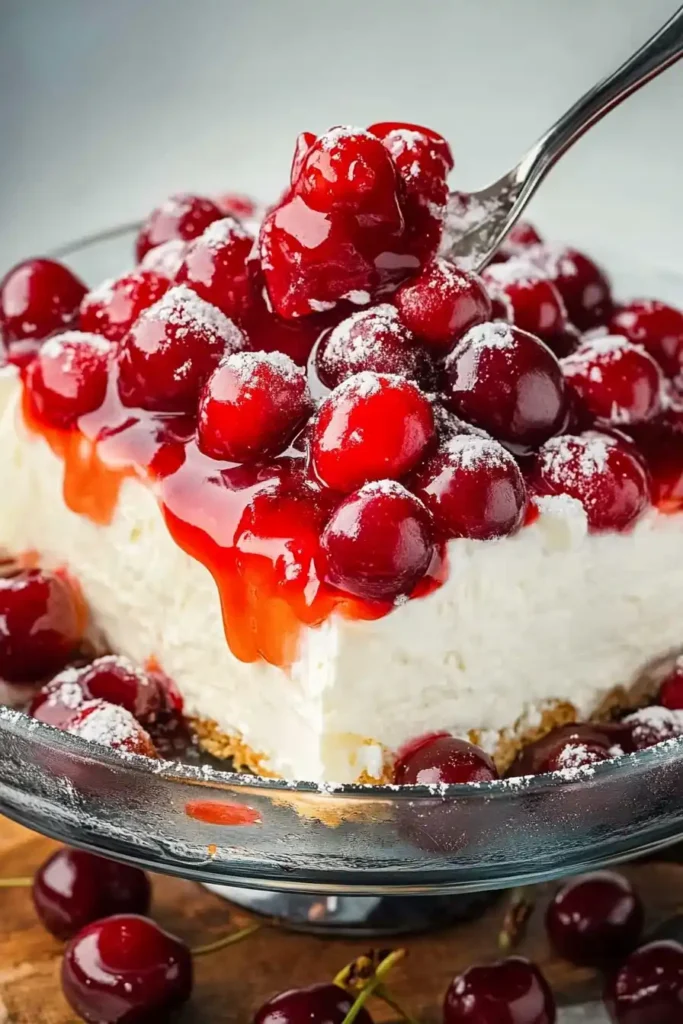
- Dust the top lightly with powdered sugar for a “fresh snowfall” effect.
- Add a few fresh mint leaves for a pop of green color against the red and white.
- Pipe extra whipped topping rosettes around the edges before serving.
These small touches make the dessert look even more special — perfect for holiday tables, birthday parties, or family reunions!
Serving Suggestions for the Cherries in the Snow Recipe
The beauty of this cherries in the snow recipe is how effortlessly it transforms into a showstopper, no matter the occasion. Whether you’re setting a holiday table or preparing a potluck masterpiece, this dessert always steals the spotlight.
Perfect Occasions to Serve It
- Christmas Celebrations: The bright red cherries and snowy cream make it a natural fit for holiday feasts.
- Valentine’s Day: A romantic red-and-white treat to sweeten your special dinner.
- Family Reunions & Potlucks: Easy to transport, easy to serve, and guaranteed to get rave reviews.
- Brunch Parties: A lighter, fruity dessert that feels just right after a hearty breakfast spread.
- Baby Showers or Weddings: Layer it in individual cups for an elegant, personal touch.
Tip: Layering in clear glasses or mason jars makes for gorgeous individual servings that travel well!
Tips for Best Results with Cherries in the Snow Recipe
To ensure your cherries in the snow recipe comes out absolutely perfect, here are some tried-and-true tips from seasoned bakers and family recipe cards.
Cake Handling Tips
- Let It Cool Completely:
If you’re baking your own angel food cake, make sure it’s completely cool before cutting. A warm cake can collapse or crumble too much. - Use a Serrated Knife:
Sawing gently with a serrated knife preserves the cake’s airy texture. - Don’t Pack the Cubes:
Layer them loosely to allow the cream cheese filling to settle around the edges for the best texture.
Cream Cheese Mixture Tips
- Room Temperature is Key:
Softened cream cheese blends smoother and faster, avoiding lumps in your filling. - Fold, Don’t Beat:
When adding whipped topping to the cream cheese mixture, gently fold to keep the mixture fluffy.
Assembly Tips
- Layer Evenly:
Smooth each layer out carefully so you get distinct bites of cake, cream, and cherries. - Chill Thoroughly:
Four hours minimum is best, but overnight chilling produces a firmer, more sliceable dessert. - Decorate Right Before Serving:
If adding powdered sugar or mint garnish, wait until right before serving to keep everything looking fresh.
Common Mistakes to Avoid
- Over-mixing the whipped topping: This can deflate your cream layer.
- Using too much cherry filling at once: Spread it gently to avoid sinking into the cream layer.
- Skipping the chill time: It’s tempting, but patience pays off with a perfect texture.
Pro Tip: Always taste the cream cheese mixture before layering. Some prefer a bit more powdered sugar for extra sweetness!
Storage Instructions for Cherries in the Snow Recipe
Thanks to its cool, creamy nature, this cherries in the snow recipe stores beautifully — making it ideal for make-ahead entertaining.
How to Store
- Refrigerator:
Cover the dish tightly with plastic wrap or a lid. Store in the fridge for up to 4 days. The flavors deepen and improve as it sits! - Freezing:
Technically, you can freeze this dessert — but it’s not ideal. The whipped topping may lose some of its structure when thawed.
If you must freeze:
- Assemble the dessert without the cherry topping.
- Wrap tightly with plastic wrap and foil.
- Freeze for up to 1 month.
- Thaw overnight in the refrigerator, then add the cherry topping just before serving.
Important: Never freeze a dessert that’s already been topped with canned cherry pie filling — the texture becomes watery when thawed.
How to Revive Leftovers
If your dessert sits in the fridge for a couple of days and starts looking a little “weary,” you can freshen it up:
- Add a few extra dollops of whipped topping.
- Top with a few fresh cherries or a fresh mint sprig.
- Dust lightly with powdered sugar for a snowy refresh.
FAQ about Cherries in the Snow Recipe
Over the years, people have had lots of questions about this beloved cherries in the snow recipe. Here’s everything you need to know before you dive in!
Can I Make Cherries in the Snow a Day Ahead?
Absolutely — and it’s actually recommended!
The flavors meld together beautifully when this dessert chills overnight. It slices more cleanly too, making it easier to serve perfect squares.
Can I Use a Homemade Angel Food Cake?
Yes!
Homemade angel food cake gives a richer, fresher taste to your cherries in the snow recipe. Just make sure the cake is completely cooled before cutting it into cubes to preserve its airy texture.
Can I Use Fresh Cherries Instead of Canned?
You can — but fresh cherries need to be cooked into a pie filling first, or they won’t have the syrupy texture that this cherries in the snow recipe relies on.
To make quick homemade cherry pie filling:
- Simmer 3 cups of pitted fresh cherries with ¾ cup sugar, 2 tablespoons lemon juice, and 1 tablespoon cornstarch dissolved in a little water. Cool before using.
Can I Make Cherries in the Snow in Individual Cups?
Definitely!
Layering the ingredients into small mason jars or clear plastic cups makes for a stunning portable dessert — perfect for parties or picnics.
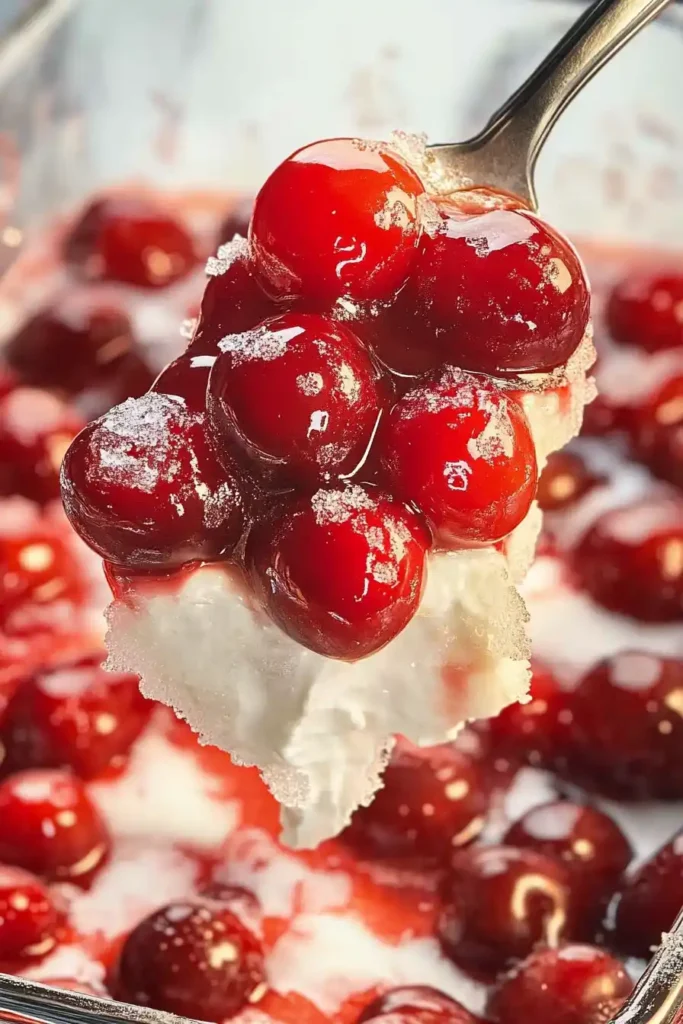
What’s the Best Way to Serve It?
Cold, straight from the fridge.
Use a big spoon to scoop generous portions into bowls or plates. If you want extra flair, add a dollop of fresh whipped cream or a sprinkle of grated white chocolate on top!
Conclusion
There’s something beautifully comforting about a recipe that has stood the test of time. This cherries in the snow recipe is more than just dessert — it’s a memory, a tradition, and a celebration of simple pleasures.
Whether you grew up eating it at Grandma’s kitchen table or you’re discovering it for the first time, each bite is a reminder that the best desserts aren’t always the fanciest — they’re the ones made with love, shared with laughter, and savored slowly.
Make this cherries in the snow recipe part of your story. Whip it up, share it generously, and watch the smiles unfold like fresh snow on a winter morning.
Print
Cherries in the Snow Recipe
- Total Time: 20 minutes + chilling
- Yield: 12–16 servings 1x
- Diet: Vegetarian
Description
This no-bake cherries in the snow dessert layers angel food cake, creamy filling, and cherries for a nostalgic holiday favorite.
Ingredients
Base Layer:
- 1 prepared angel food cake (store-bought or homemade), cubed
Cream Layer:
- 1 package (8 oz) cream cheese, softened
- 1 cup powdered sugar
- 1 teaspoon vanilla extract
- 1 tub (8 oz) whipped topping (e.g., Cool Whip), thawed
Topping:
- 1 can (21 oz) cherry pie filling
Instructions
- Make Cream Mixture: Beat softened cream cheese in a large bowl until smooth. Add powdered sugar and vanilla; beat until well combined. Fold in whipped topping gently until fully incorporated.
- Prepare Cake: Cut angel food cake into 1-inch cubes using a serrated knife.
- Layer Dessert: In a 9×13-inch dish, layer half the cake cubes, half the cream mixture, and half the cherry pie filling. Repeat with remaining ingredients.
- Chill: Cover and refrigerate for at least 4 hours or overnight for best results.
- Serve: Scoop into bowls or slice into squares. Optionally garnish with powdered sugar, fresh mint, or extra whipped topping.
Notes
- For a richer flavor, use mascarpone instead of cream cheese.
- Substitute cherry pie filling with blueberry or raspberry for variety.
- Can be made in a trifle bowl or individual jars for a fancier presentation.
- Store in fridge for up to 4 days. Not ideal for freezing with cherry topping.
- Prep Time: 20 minutes
- Cook Time: 0 minutes
- Category: Desserts
- Method: No-Bake
- Cuisine: American
Nutrition
- Serving Size: 1 slice
- Calories: 275 kcal
- Sugar: 28 g
- Sodium: 250mg
- Fat: 11 g
- Saturated Fat: 7g
- Unsaturated Fat: 3 g
- Trans Fat: 0 g
- Carbohydrates: 38g
- Fiber: 1 g
- Protein: 4 g
- Cholesterol: 30mg
Additional Recommended Recipes
If you loved this cherries in the snow recipe, here are a few more nostalgic treats you’ll adore:
- Strawberry Cheesecake Dump Cake Recipe – A luscious layered treat that brings back the joy of potluck classics.
- Cheesecake Crescent Roll Casserole – Flaky, creamy, and sweet—just like the best 70s brunch spreads.
- White Chocolate Raspberry Cheesecake Balls – Bite-sized indulgence with a creamy, fruity twist.
- 100 Year-Old Fruit Cake Recipe – A timeless holiday treasure rich with history and flavor.
These nostalgic desserts echo the charm and comfort of Cherries in the Snow—perfect for celebrations or sweet everyday moments.

Comments and Reviews